DIY Bathroom Flooring Installation: Tips and Tricks from the Pros


Preparing for Your DIY Bathroom Flooring Project
Embarking on a DIY bathroom flooring installation can be a rewarding experience, both in terms of cost savings and personal satisfaction. However, preparation is key to ensuring a smooth and successful installation process. Start by selecting the right type of flooring for your bathroom. Consider options like vinyl, ceramic tiles, or laminate, each offering unique benefits such as water resistance and durability.
Before you begin, gather all necessary tools and materials. Commonly needed items include a tape measure, utility knife, adhesive, trowel, spacers, and a level. Having these tools on hand will prevent interruptions during the installation process. Additionally, ensure the bathroom floor is clean and level to provide a solid foundation for your new flooring.
Measuring and Planning Your Layout
Accurate measurements are crucial in any flooring project. Start by measuring the length and width of the bathroom to calculate the total square footage required. It's wise to purchase 10% more material than needed to account for mistakes or future repairs. This extra material can be invaluable should you need to replace any sections down the line.
Once you have your measurements, plan your layout. This step involves deciding the direction in which you will lay the flooring and how you will handle obstacles such as toilets and vanities. A well-thought-out layout ensures minimal waste and a polished final appearance.

Installing the Underlayment
An underlayment provides a smooth, moisture-resistant surface for your new flooring. Depending on your chosen flooring type, this may involve laying down a layer of cement board or foam underlayment. Make sure the underlayment is cut to fit snugly against walls and fixtures, securing it with adhesive or screws as necessary.
Pay attention to manufacturer instructions regarding underlayment installation. Properly installed underlayment not only enhances the floor's durability but also improves comfort underfoot. This step is particularly important if your bathroom floor tends to encounter high levels of moisture.
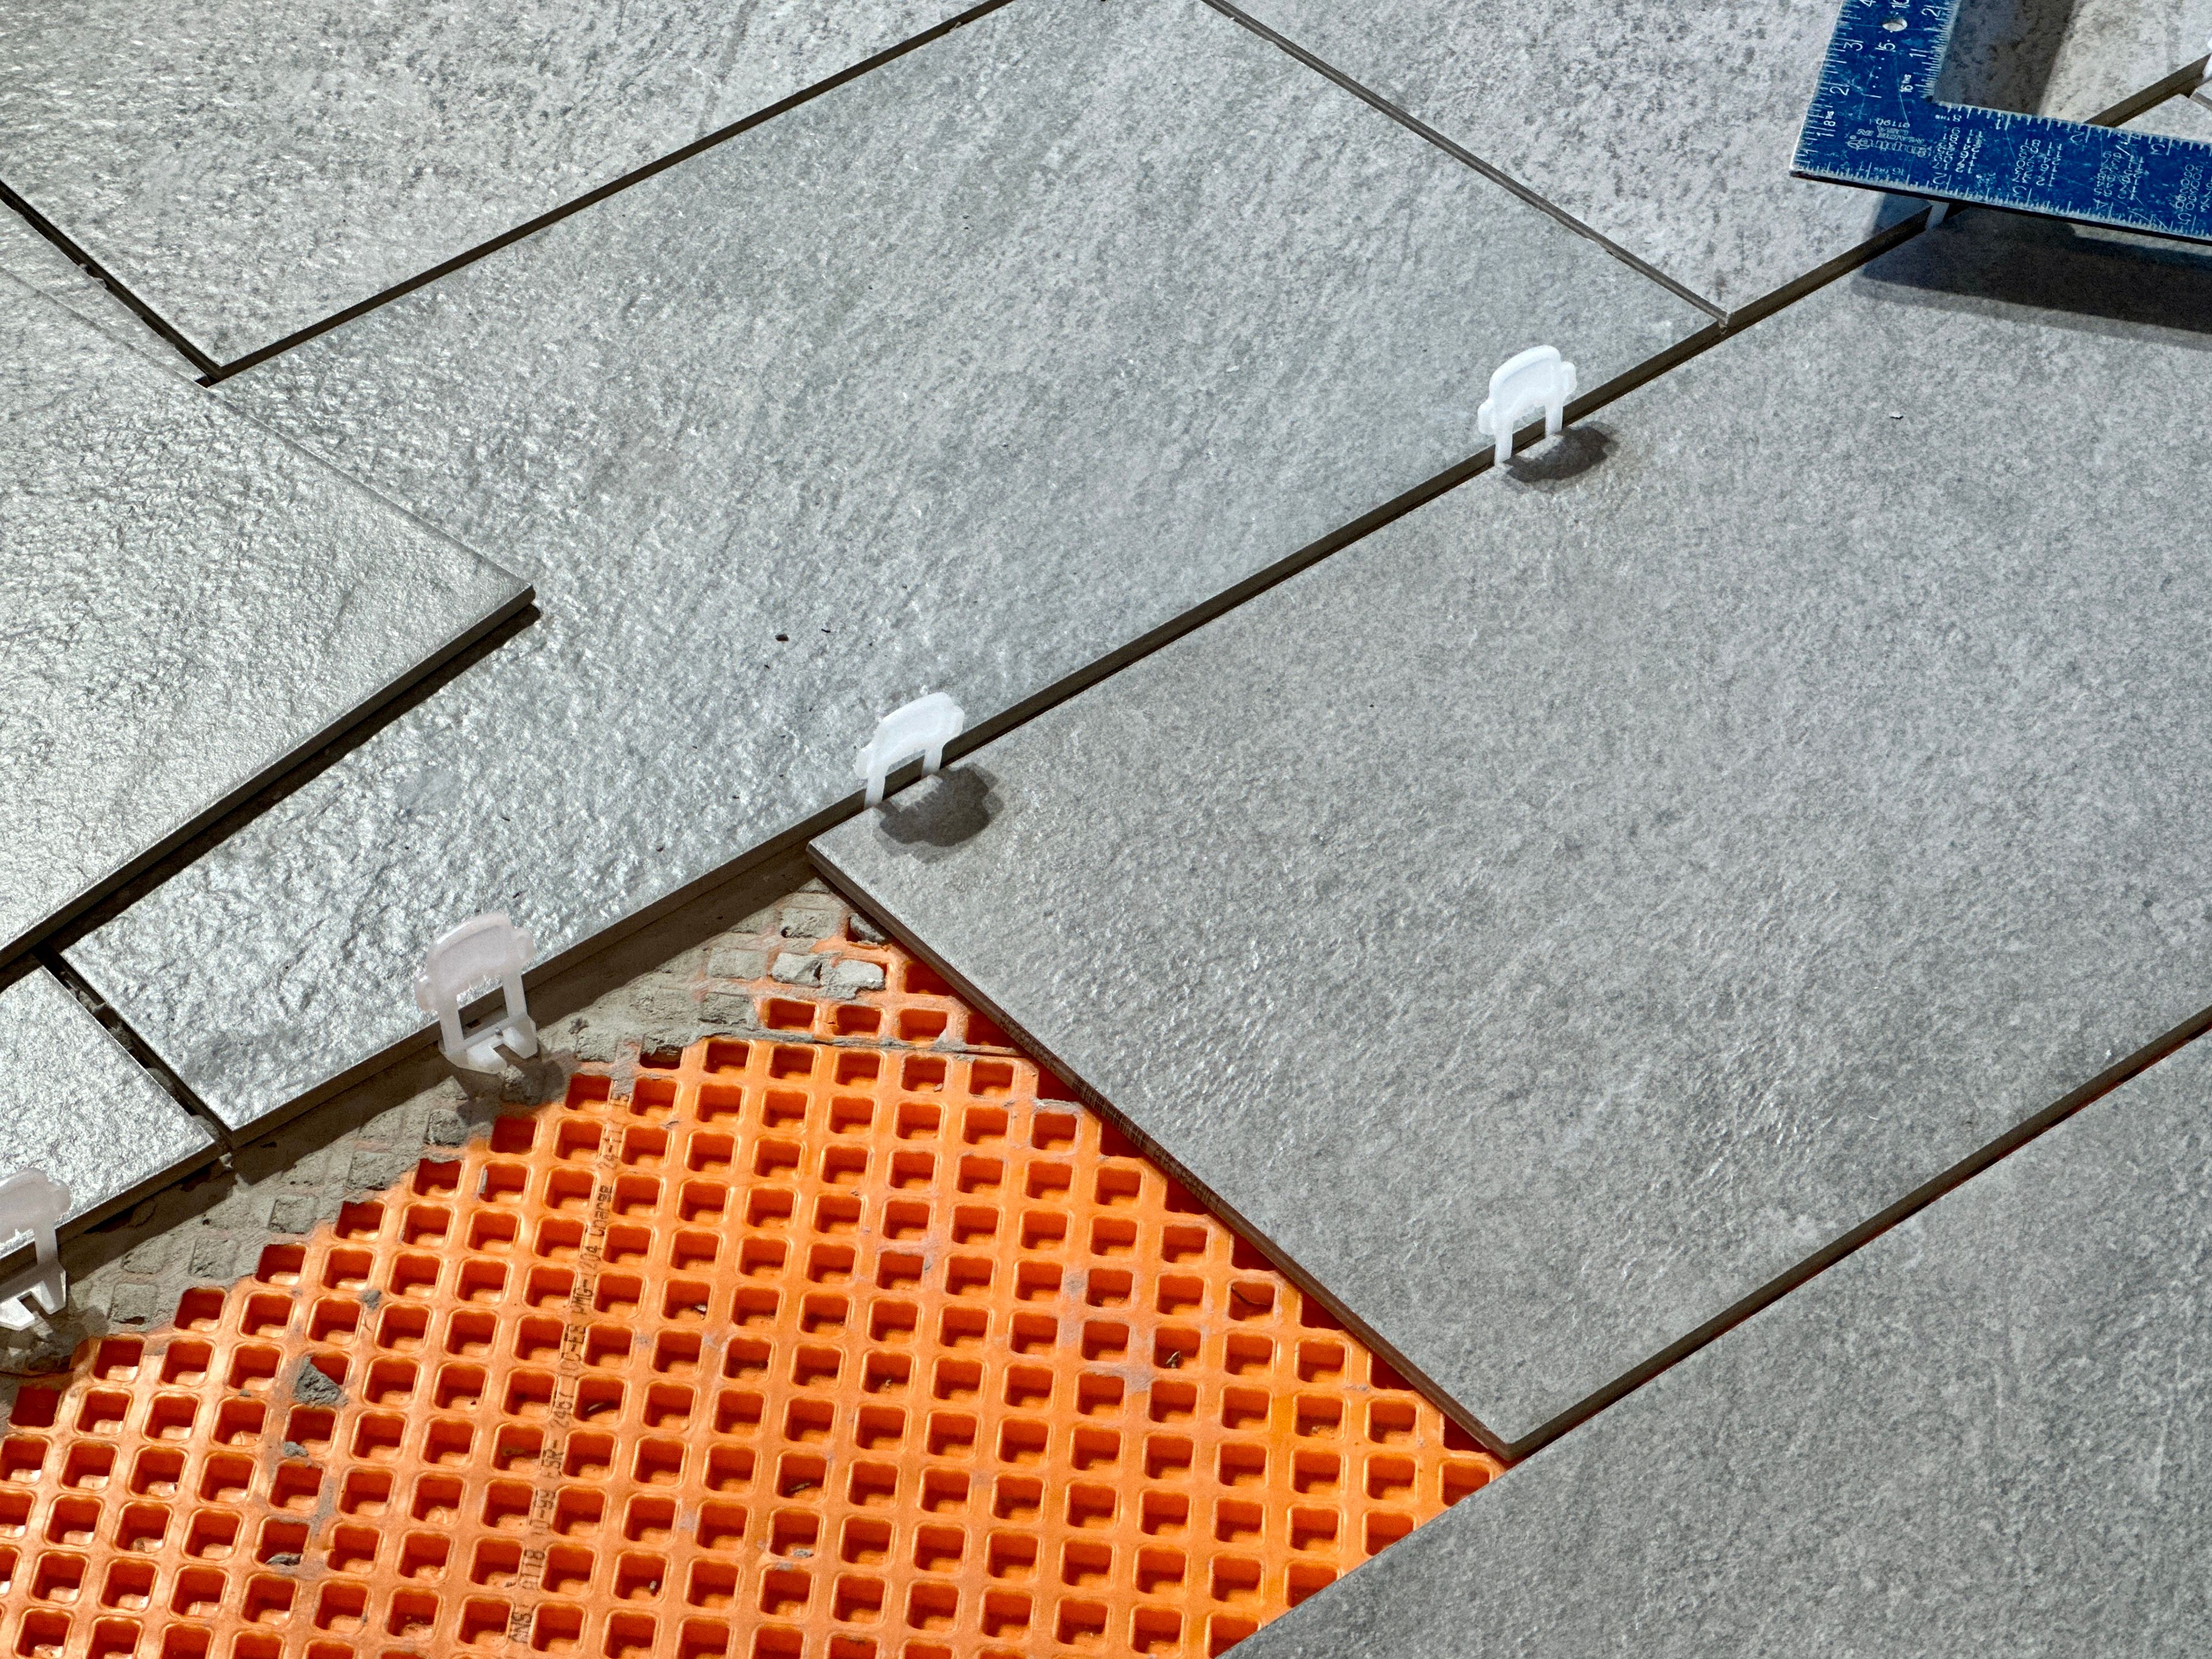
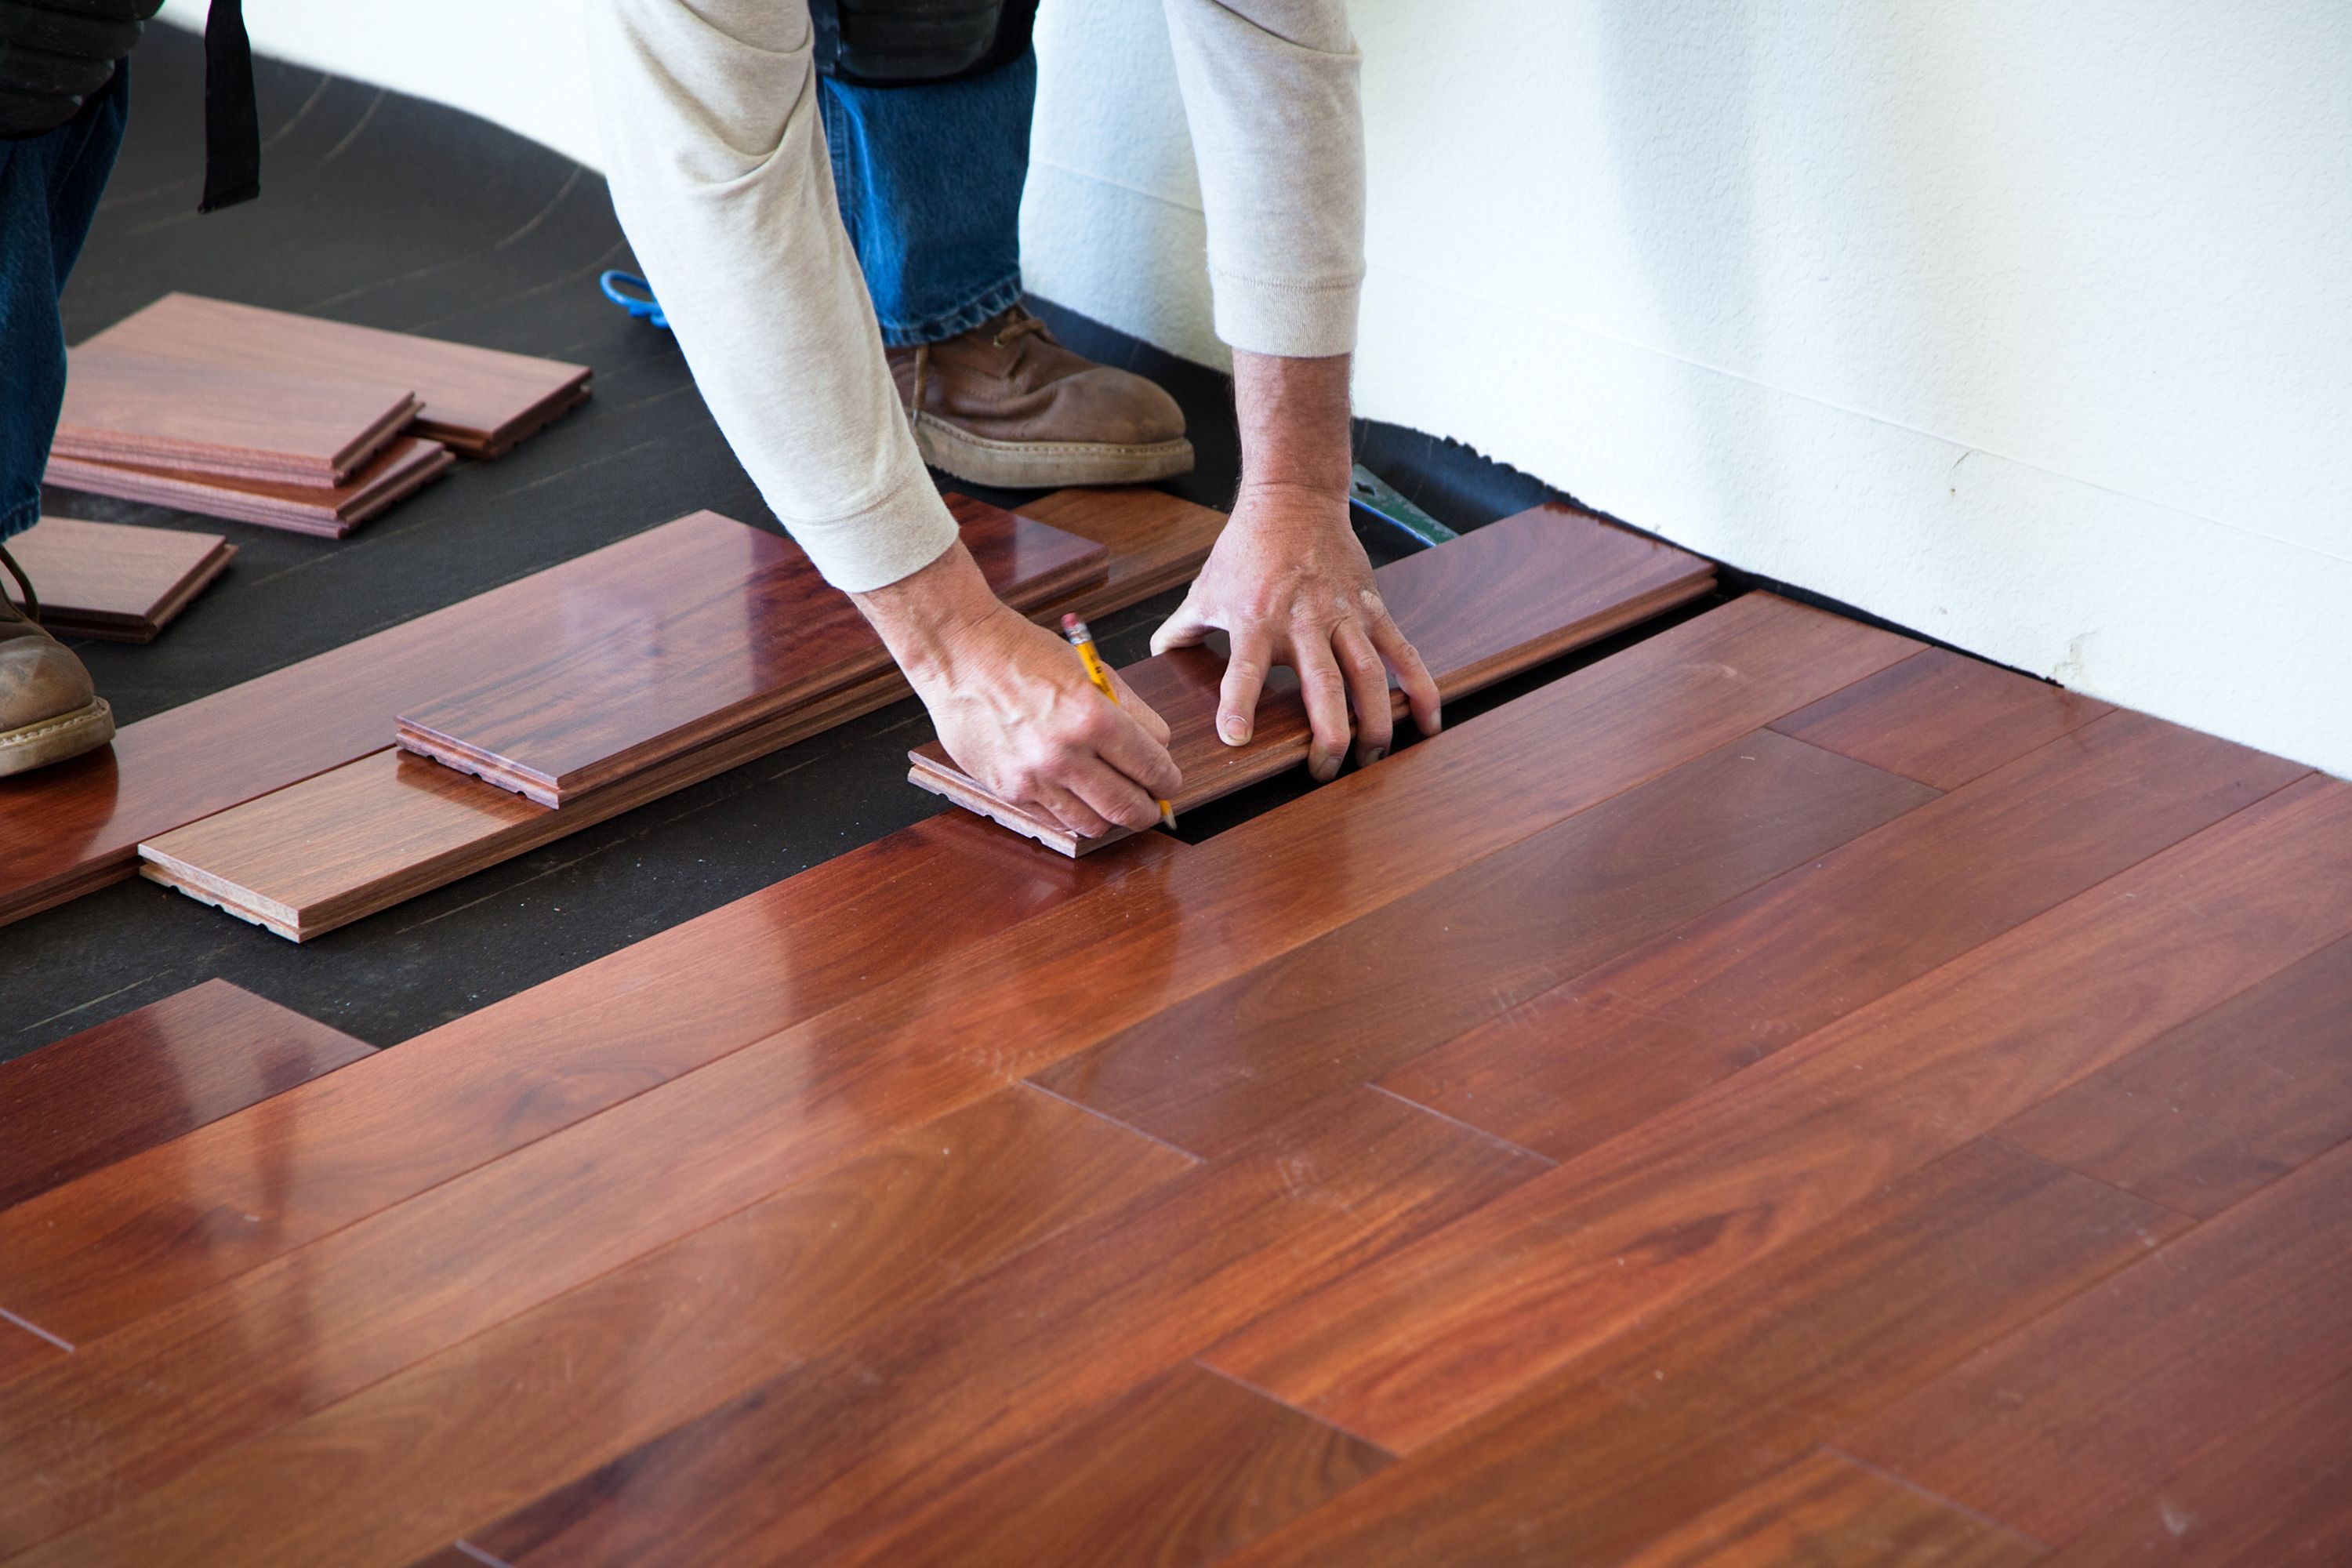
Laying Your Bathroom Flooring
With the underlayment in place, it's time to lay down your flooring. Begin in one corner of the room and work your way outwards, using spacers to maintain consistent gaps between tiles or planks. For tiles, apply adhesive evenly with a trowel before pressing each tile firmly into place. For planks, follow the interlocking system typically used for laminate or vinyl flooring.
As you lay each piece, frequently check that everything is level and aligned. Small adjustments can make a significant difference in the overall appearance of your flooring. Take your time cutting pieces to fit around fixtures, ensuring a clean and professional finish.
Finishing Touches
Once all tiles or planks are in place, allow adequate time for any adhesives to set completely. This step is crucial for ensuring the longevity of your new floor. Afterward, remove spacers and fill in gaps with grout or sealant as appropriate for your flooring type.
Finally, clean the surface thoroughly to remove any excess grout or adhesive residue. A clean floor highlights the beauty of your hard work and enhances the overall aesthetic of your bathroom.
Conclusion
Installing bathroom flooring yourself can be a fulfilling project with the right preparation, tools, and attention to detail. By following these tips and tricks from the pros, you can achieve a beautiful and durable floor that enhances the functionality and style of your bathroom. Dive into your DIY journey with confidence, knowing that each step you take brings you closer to a stunning finished product.